Many homeowners want to redevelop their apartments. To do this, sometimes you have to make new openings in the walls. We will tell you how to do this kind of work correctly.
The monetary costs of the opening device depend on who will perform such work. You can do it yourself or hire specialists. If you chose the second option, that is, the help of qualified builders, then the cost of making an opening in the wall will naturally be higher than if you did it yourself. But the responsibility for the final result in this case will be theirs. If you decide to do everything yourself, then be prepared to take full responsibility for yourself.
As for the cost, in this case it will be related to whether you have a diamond disc, the presence of which greatly facilitates the work. If you do not have it, then for one time there is no point in purchasing it. You can try to find such a disk with friends in order to make an opening in the wall of the apartment. In this case, the cash costs will be only for the purchase of channels and the necessary consumables. The price of the channel varies depending on the material and size.
Before you get started, you must collect all the necessary information. You should know the arrangement of wall openings. In particular, you must consider what material the walls are made of, what width of opening you need, how many floors are in the building, whether there are defects in the walls (these can be cracks, bends or potholes). In addition, knowledge about the location of the floors, what their type and what height they are, will come in handy. This information is needed in order to correctly calculate how much reinforcement of the opening in the load-bearing wall will be required. The more floors in the building, the more massive the opening, the greater the number of various defects, the more reliable the lintel should be. In any case, it is best to use steel channels. Although their cost is small, the reliability will be quite high.
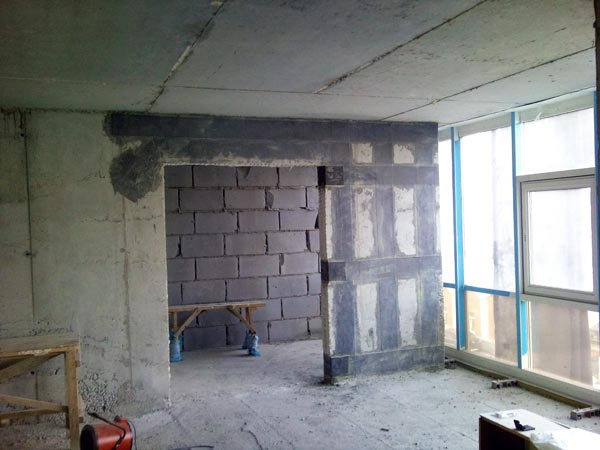
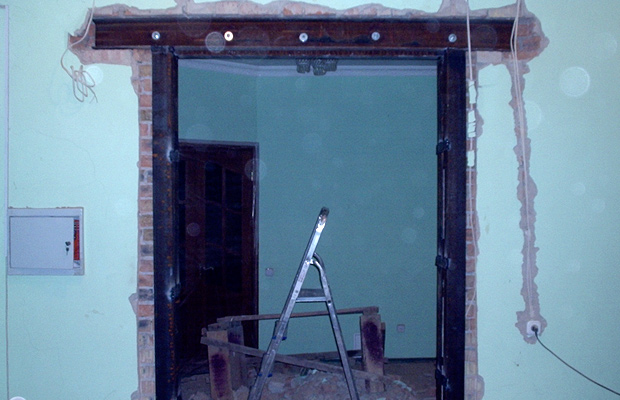
Holes in the walls. The photos below show what they look like.
The first thing to do is to clean the wall of old plaster and wallpaper. Then take a tape measure with a pencil and mark the opening.
When the markup is done, you should walk with a grinder with a diamond disc installed with a diameter of at least 200-250 mm. If necessary, make an opening of the exact size, the grinder will also need to walk along a horizontal line.
The result will be small cuts that play the role of the boundaries of the future opening. Their depth is usually limited to a particular diamond blade.
Next, you need to equip a reinforcing jumper from above. If this is not done, then the wall may burst or collapse. The jumper can be constructed from a corner (its size is at least 35 mm). Then, when cutting openings in the wall, a pair of corners is cut off, which should be 350-400 mm longer than the opening.
Further, with the help of a grinder with a diamond disk installed on it, the upper part of the opening is cut. It must be made 160-200 mm larger than the width of the opening. Then the corners must be inserted into the cut made before and secured with anchor studs.
The next step is to fill the gap with cement mortar.
Next, you can begin to dismantle the brick wall. The section of the wall where an opening is needed can be removed with a diamond-coated cutting tool. But not every owner has it. Therefore, the majority for this purpose use a puncher, a grinder, or, in their absence, a sledgehammer with a chisel.
In some cases, a grinder can cut a brick completely, but this does not always happen. The first stone can be easily knocked out using a hole puncher. Then, with a chisel and a hammer, the work begun on the demolition of part of the partition is completed.
Next, the entire brick is gradually removed.
After that, we finalize the jumper. To do this, both corners are welded together from the bottom side. If it is not possible to carry out welding work, then they can be fastened with metal plates. The necessary holes are made in the corners and the plate, after which they are fixed together with powerful fasteners, preferably with metal screws.
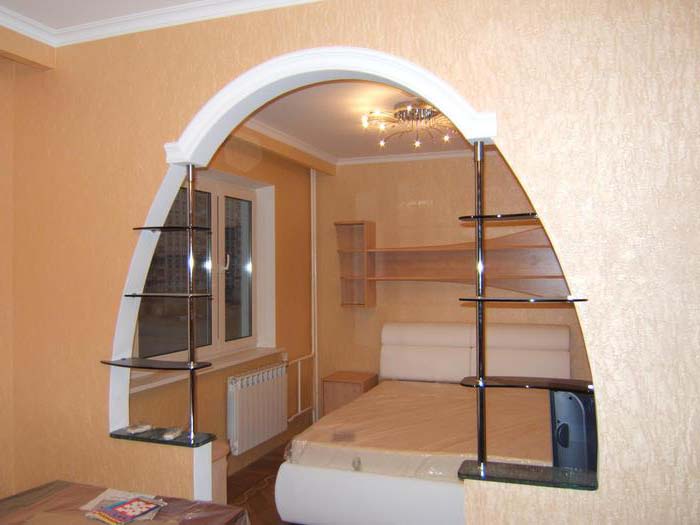
Of the remaining work, you only need to slightly ennoble the resulting opening in the brick wall. After that, you can insert the design for which it was intended.
Opening in a concrete wall
Concrete walls are usually load-bearing. Therefore, it is important to correctly calculate the design of the strapping and reinforcing frame. You may or may not have experience in this area. Then it is better to entrust the work to specialists.
But, first of all, it must be borne in mind that for any change it is necessary to obtain the appropriate permission. In addition, it is required to draw up a drawing for the opening in the wall, or, more precisely, a plan that describes the actions for the future redevelopment of an apartment or house. Moreover, this plan should be sufficiently detailed. Then it is more likely to be approved by the relevant organization. Reconstruction can only be started when permission is obtained to carry out the necessary work.
In any case, the first thing to do is to draw the markup. After the same drawing is transferred to the opposite side of the wall. For example, you can drill through holes in the corners of an existing markup. After that, take a drill with a diameter of 10-13 mm and make them around the entire perimeter. In this case, there must be at least 30 mm between adjacent holes.
When working with concrete walls, diamond saws are very useful. If they are not available, then the work will be quite difficult and lengthy. When the wall is broken, a strapping is made (the material for it is a metal channel). Instead, you can use corners welded together.
Opening in a brick load-bearing wall
As a crossbar for an opening in such a wall, a double-sided channel is best suited. In addition, vertical racks are required. To do this, you can take profile pipes 20 × 40 mm or corners 50 × 50 mm. To tie these racks you will need a metal strip.
When all this is available, then you can make markings on the wall. After that, incisions are made on it. This can be done, for example, using an ordinary grinder.
It is quite difficult to work with "well" brickwork. In this case, the thickness of the wall is usually 2-3 bricks, and on both sides of the well. First of all, you need to install the crossbar at the top of the wall. Therefore, it is enough to knock out only part of the wall at the top. Next, we insert a pre-cut piece of the channel into the embossed part, which we strengthen from below with a corner or a square pipe.
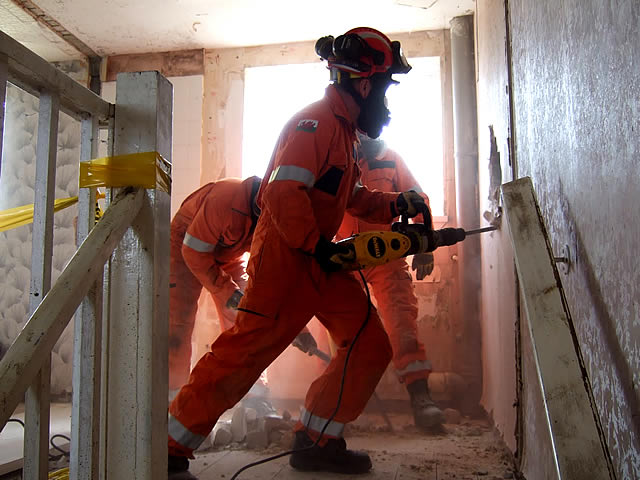
When the installation of one of the sides of the channel is completed, you can continue to remove unnecessary brickwork. Until the channel is in place, it is impossible to continue working with the wall. Be sure to follow safety precautions. If you do not take this work seriously, then injuries and even fatal consequences are possible. Be especially careful if you make an opening in the main wall.
Hole in plasterboard wall
To avoid problems with garbage collection, you can lay a plastic film on the floor before starting work. The process of breaking through a decorative opening is in many ways similar to the technologies described above.
Installation procedure:
First you need to remove and move to some other place the lamps and sockets. And do not forget to turn off the electricity in the house in advance. Then the rule (you can take the rail) is inserted by level. At the same time, the boundaries of the future opening are marked with a simple pencil.
Next, using the mount, you should remove the remnants of the previous finish to make room for a door or window opening in the wall.
Then take a clerical knife in your hand and use it to carefully cut the surface of the drywall according to the previously made markings. Further, with the help of a hammer, the sheet is punched in the center of the place where the opening will be made. Moving from the punched hole to the edges, drywall should be broken off with pieces.
Now you need to remove the remnants of the material from the opening. This is done in exactly the same way as described above.
When the dismantling of drywall is completed, you should take a saw and use it to cut and remove the frame beams. By the way, the reciprocating saw has quite a strong return. Therefore, if you have not worked with this tool before, then a regular hacksaw will do. If necessary, you can help with a crowbar-mount.
Now vertical racks are made from a wooden bar, which are then placed between sheets of drywall on both sides of the opening in the panel wall. In the same way, you need to install the beam at the top of the opening. It is important that nails are not visible from the bars.
All unnecessary scraps of material, sawdust and other debris should be removed from the workplace. The bars may protrude beyond the skin. If so, then you can attach strips of drywall of small width to them.
During installation, the casing may protrude. In this case, you need to remove the excess. This can be done, for example, with simple tongs, remembering to make an incision along the perimeter in advance. For this purpose, you will need a clerical knife.
The inner surface of the bars should be sheathed with drywall. In addition, small dents must be made around the perimeter of the joints of the sheets. This can be done with a simple hammer.
A thin layer of putty is applied to the seam and masking tape is laid. Then another layer of the mixture is applied on top of it. When it dries, the places with applied putty must be sanded with sandpaper (preferably fine-grained). It remains only to process the wall with dirt and paint it.
To know how to make a hole in the wall correctly, check out the following tips:
If you want to break through the opening, then it is advisable to first knock out a place in the wall where the jumper is supposed to be installed. When this happens, a crossbar is installed there and poured with cement mortar. Next, you need to wait until the cement properly fixes the crossbar. This usually takes about 8 days. Then you can continue to knock out the remaining masonry and complete the opening.
If the masonry is spoon, then the halves of the bricks that interfere with the normal installation of the doors must be knocked out with a perforator. The most important thing is to work with it so that its nozzle is perpendicular to the wall. It is impossible to go into the opening and from there knock out parts of the wall with a tool so that the shock wave is directed from top to bottom. If this requirement is not met, then the crossbar may simply not withstand.
If the halves of some bricks stick out in the opening, then they can be knocked out completely.