Work on applying relief plaster can be called art, this is especially true if the master aims to create a wall panel. It will be able to decorate the walls even in a respectable mansion. Looking at such works, it is difficult to imagine that they are made using ordinary plaster.
Such compositions are now common in wall decoration, and the creation of unique patterns and patterns, which are very difficult to repeat, is a feature of the technique. As a result, a relief surface is formed on the wall, the color tonality and diversity of the structure of which can be achieved in different ways. If desired, the color of the walls can later be changed. It is very simple to do this, you will only need to purchase the paint of the desired shade, which is applied with a sponge or roller.
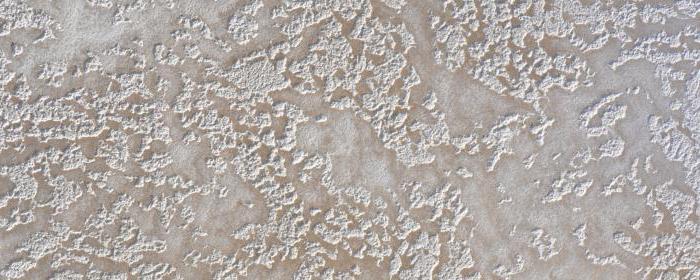
By applying relief plaster, you can create a surface with slightly protruding elements. In other cases, the pattern rises 15 mm above the surface. The master can create a sense of volume with just one color. Sometimes the drawing imitates the bark of a tree, tall grass; in other cases, insect-damaged surfaces, stone and other natural materials. The plaster is plastic, it is easy to apply to the surface and create a variety of patterns.
You can create decorative plaster yourself, but before that you need to familiarize yourself with the main varieties in order to know what ingredients are used in the composition. On sale today you can find plasters:
As a binder, the former use:
The filler is granite or marble chips. Mineral compositions are made in the form of a dry mixture, which should be diluted with water before application. Water-dispersion relief plaster is made on the basis of acrylic polymer resins. The fillers are finely ground marble flour, ash fractions of blast-furnace slags, glass chips and other mineral components. Usually they have a pasty consistency, and after purchase they are ready for use.
Silicone plaster has high molecular weight resins, therefore it has high performance properties. As for silicate compositions, they are made on the basis of potassium liquid or sodium glass. Used for application on rough surfaces made of monolithic and cellular concrete, silicate or fired bricks.
The application of silicate compositions can be carried out on fiberglass or mineral insulation materials, as well as foam. If you decide to make relief plaster with your own hands, you should remember that the nature of the surface texture will depend on the size of the aggregate particles. This indicates that in order to obtain a relief and rough texture, it is necessary to choose compositions with coarse mineral particles. As for the fine finish, which will imitate natural materials such as crocodile skin, natural wood and natural stone, in this case, fine mixtures should be preferred.

Having examined the photo of relief plaster, you can make such a mixture yourself. The process will use affordable and inexpensive materials sold in a building supply store. For example, plaster for interior work can be made from sifted and washed river sand, which is used in the amount of 3 parts by volume.
If you decide to use quarry sand, then it must be soaked for several hours in cold water to get rid of the remnants of greasy clay. For the manufacture of the mixture, a starting finely ground gypsum putty is used, which is used for preliminary leveling of the walls. This ingredient will be added in the amount of 3 parts by volume.
The binder will be dry gypsum mortar in the amount of 1 part. The components are well mixed in dry form, then cold water is added to them. The composition should be mixed again with a construction mixer until a homogeneous consistency.
If you are wondering how to make relief plaster, you can use the following technique. In a water-based waterproofing primer intended for surfaces based on mineral materials, it is necessary to add water in a ratio of 2 to 1. Pour the starting gypsum putty into the resulting composition, and then mix the mixture until a creamy consistency is obtained.
The finished solution is left for 15 minutes, and then it can be mixed again and used for application. Homemade and decorative plasters dry quickly. This suggests that you need to cook them in the amount that you have time to work out within 30 minutes.

Relief plaster of the Venetian type contains dust from marble, granite, malachite, quartz, etc. Hydrated lime or acrylic resins act as a binder. All the ingredients are known, but making such a mixture on your own will not work. The main reason is the lack of acrylic resins in the general market. If they can be found, they will not have the desired quality.
However, the mixture can be made from improvised materials. As a result, it will be possible to obtain a composition that will repeat the classic Venetian plaster - if not in terms of operational, then in terms of decorative qualities. The similarity will be quite complete. Such decorative plasters are made from:
Relief decorative plaster is made from two parts of dry gypsum, putty mixture and 70% marble sand. The master will need 6 parts of dry chalk, as well as wood glue, which is added in a volume of 5% of the amount of dry ingredients. Lime paste is added in a volume of 10%, marble flour - in an amount of 13%, and white Portland cement - in a volume of 7%. It is necessary to take cement brand M400.
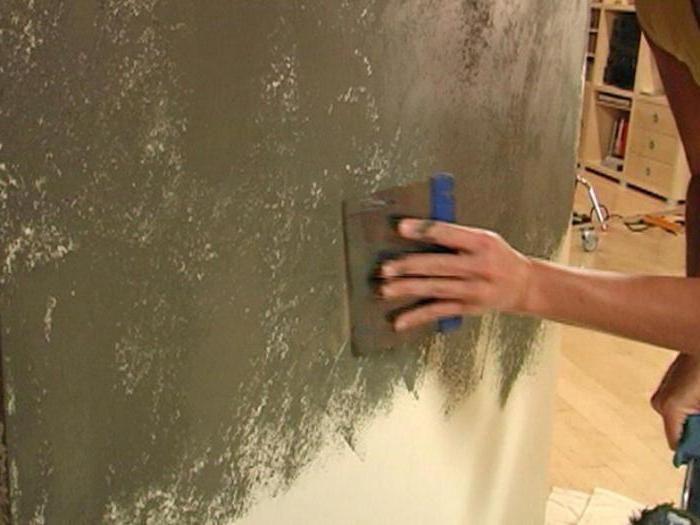
Relief plaster for interior work is applied using several tools. For example, to give a pattern to a bubble surface or to form a color tone, you need a sponge. The roller with the selected nozzle allows you to create an impression on wet plaster.
Using a brush, plastic wrap or a rubber glove, you can give the wall volumetric shapes. In general, any element that has textured forms can come in handy. They are imprinted on wet plaster and make it embossed. To form some reliefs, the main tools are spatulas of different widths. Without them, creating a three-dimensional drawing will not work.
Before you carry out relief plastering of the walls, it is recommended to consider the photo. Perhaps they will allow you to sort out the textures and patterns that you would like to see in the interior. After that, you can begin to prepare the walls. All surfaces are preliminarily well cleaned of old decorative coatings.
If the old plaster adheres well and is of high quality, then after removing whitewash or paint from its surface, notches can be applied with an ax, deepening by 8 mm. This will improve the quality of adhesion of new and old plaster. Sometimes this layer is removed completely, which is required if the material began to peel off when tapped.
The prepared surface should be cleaned of dust and plaster. Then the base is covered with an antiseptic primer, if necessary, the process can be carried out two or three times. The primer is applied with a wide brush or roller, each layer is formed at a time. Multiple leaks should be avoided. After the primer has dried, you can begin to knead the plaster solution to form the base layer.
Relief plastering of walls is carried out after surface preparation. To do this, remove old plaster, wallpaper, paint and other finishing materials from them. Fine dust should be swept away with a broom or brush. Some surfaces require primer treatment. It is used as an antiseptic to protect the wall from insects and fungus.
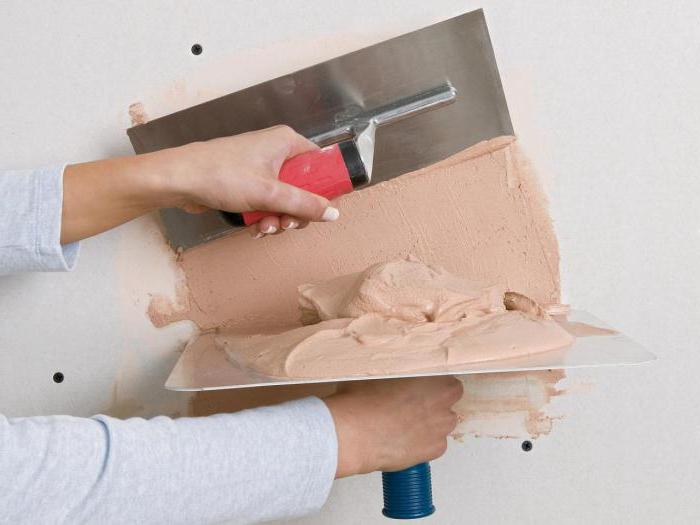
Once the surface is ready, you can apply the starting layer of plaster, which will be the basis for the finishing layer with a relief pattern. After the plaster has dried, it is coated with a primer, which will add adhesive qualities to the surface.
After drying, you can start relief plastering of the walls. For each drawing, its own manipulations are carried out. Sometimes the reproduction of a pattern requires the application of several layers. Moreover, each of them is applied after the previous one has completely dried. The wall is covered with color, and after the paint has set, the excess protruding parts can be removed with a damp sponge. This process will emphasize the volume of the relief and separate the color into different tones.
Texture Gaufree - relief plaster, which is sold in buckets of 2.5 liters. You can buy material with such a volume for 1,000 rubles. It will be enough for 15 m 2. This plaster can be used to create various relief effects. By choosing tools, you can achieve a finish with a unique 3D texture.
Among the devices should be highlighted:
This composition is suitable for rooms with normal humidity, among them:
Before applying the composition, the surface is treated with impregnation or primer. Among the main advantages, it is worth highlighting the resistance to wet cleaning of the formed layer, as well as the cost-effectiveness of the material, despite the fact that it has a rather high cost. In addition, if necessary, plaster can be given other shades during operation, for this, tinting compounds in syringes are used.
If you decide to use decorative plaster to finish the walls in the room, you should objectively evaluate your capabilities. Decorative plastering is not a very complicated process, but it requires certain skills from the master, as well as strict adherence to technology.
Among other things, before starting work, you need to make sure that you have a certain set of tools available. Textured plaster involves the observance of the technology of special application of layers. This may take more than one day, because it is important to leave each layer until it hardens, only after that you can start applying the next one.


